Stay Connected

Photobucket Photobucket Photobucket

Friends

Grab A Button

Photobucket

Search This Blog

Blog Lovin'

Easy Blog Tips!
TCBOTB
Powered by Blogger.
Showing posts with label sweets. Show all posts

Tuesday, July 10, 2012

German Chocolate Goodness!!

I think its about time we have another dessert posting because desserts make everything better...especially a dessert that has chocolate and coconut.  I love coconut it makes me happy :)

On a side note, I do hope to not make this completely a food blog because I by no means am a chef and as of yet cant really 100% make my own recipes so Im just sharing other recipes (with some tweeks of my own).  I always link back to the original source so please make sure you stop by their blog, let them know I sent you and if you really love their blog as much as I do then follow them!

Today's recipe is from Six Sisters Stuff blog.  These girls are seriously talented and have some super stellar recipes that I have used on multiple occasions with always fantastic results.  Today's recipe is no different and to tell you just how awesome this recipe is...my dad had me leave 4 with him!  He never asks to keep desserts because he likes to eat healthy and doesnt eat a lot of desserts.  Its really a high compliment if he wants seconds :)


German Chocolate Cake Bars


Servings: 16    Prep Time: 7min   Cook Time: 24-30min       Difficulty: Easy

Ingredients
Crust:
  • 1 box devil's food cake mix (not with pudding added)
  • 1/2 cup (1 stick) unsalted butter, melted
  • 1 large egg
Filling:
  • 1 (14 oz) can sweetened condensed milk (fat free is fine)
  • 1 tsp vanilla extract
  • 1 large egg
  • 1 cup chopped pecans
  • 1 cup shredded coconut
  • 1/2 cup milk chocolate chips

Instructions
Preheat the oven to 350 degrees. Grease a 9x13 inch baking pan.

In a medium bowl, mix together the cake mix, butter and egg, and press into the bottom of the prepared pan. The crust should not come up the sides. Bake for 7 minutes and remove from the oven. The crust will not look done.

While the crust is baking, mix together the sweetened condensed milk, vanilla, egg, pecans and coconut. Pour evenly over the warm crust and sprinkle evenly with the chocolate chips. Bake for 24-30 minutes, until the top is a light golden brown. Remove from the oven and cool completely before cutting into squares.

Now get out there and make some baked goodness!  I really loved these and I know you all remember that Im not a huge fan of chocolate :)  You know I think I might just have to go and make some more they were THAT good!!

-Rachael

Friday, May 25, 2012

Foodie Friday #27


Im so happy today is Friday because that means I get to share my awesome Mother's Day dessert with you!!  I was so happy to make this for my mom because its light, fresh, and as close to healthy as a dessert can be.  My mom isnt a big fan of sweets so this was the perfect one to make.  I think the lemon and raspberry help tone down the sweetness and thats just fine because its the perfect blend of happiness in your mouth.  Great summer dessert too since summer berries are now fully in season and wont cost you an arm and a leg to buy!  Truth be told I forgot to add the Cool Whip and berries on the top but I remembered for the picture so thats what counts.  You can serve without the topping but it does seem like its missing something.
You could probably go crazy with the flavor combination but I love lemon so that will always be lemon.  I did sub blackberry preserves for the raspberry and it tasted great too.  Just make sure if you are going to sub you use preserves, jelly doesnt have the same consistency as preserves and wont set the same.  Now on to the dessert!!

Lemon-Raspberry Mousse Squares

Servings: 12      Prep Time: 15min    Cook Time: 0     Cool Time: 4hrs    Difficulty: Easy

Ingredients

·         48 NILLA Wafers, divided
·         3/4 cup  boiling water
·         1 pkg. (3 oz.) JELL-O Lemon Flavor Gelatin
·         1 cup  ice cubes
·         1 pkg. (8 oz.) PHILADELPHIA Cream Cheese, softened
·         1/4 cup  sugar
·         2 tsp. lemon zest
·         1 tub  (12 oz.) COOL WHIP Whipped Topping, thawed, divided
·         1/3 cup raspberry preserves
·         1-1/2 cups  fresh fruit (blueberries, raspberries, sliced kiwi, sliced strawberries)

Instructions
  
STAND 16 wafers around edge of plastic wrap-lined 8-inch square pan. Add boiling water to gelatin mix; stir 2 min. until completely dissolved. Stir in ice until melted. 

BEAT next 3 ingredients in large bowl with mixer until blended. Gradually beat in gelatin. Whisk in 2 cups COOL WHIP. 

POUR half the gelatin mixture into prepared pan; cover with 16 wafers. Microwave preserves on HIGH 15 sec. or until melted; brush onto wafers. Top with remaining gelatin mixture and wafers. 

REFRIGERATE 4 hours or until firm. Invert dessert onto plate; remove pan and plastic wrap. Top dessert with remaining COOL WHIP and fruit.


I love this dessert its so light fresh and delicious.  I hope you enjoy it too!

Friday, May 11, 2012

Foodie Friday #25


Im so happy its Friday!  I cant wait for this weekend, Joe is going to try and smoke a brisket and I love a good barbeque!!  You know what goes great with brisket...a good sorbet!  This one tastes like those italian ice things, but is much easier to scoop which is awesome in my book.  The best thing about this sorbet is how easy it is to take, bonus its tangy and sweet and cold.  So refreshing and delicious you need to go out and try this.  

Raspberry Lemonade Sorbet


Servings: 6      Prep Time: 5min      Freeze Time: 30min         Difficulty: Easy

Ingredients
·         12oz frozen minute maid raspberry lemonade concentrate
·         ¼ c honey
·         1 ¾ c cold water
·         ¾ c frozen raspberry
Instructions
Combine all ingredients in a blender and process on high speed until smooth and creamy.

Pour mixture into ice cream maker and blend according to mixer instructions.

Put in freezer until sold and serve


So easy right!  I hope you go and try this one because its great for this warmer weather coming out way.  What recipes do you love making, this one is going to be one of them now!

Friday, March 30, 2012

Foodie Friday


Happy Foodie Friday everyone!  I am so excited for this weekend because Im going to go see the Hunger Games!!!  Hopefully it wont be so crowded this weekend as it was last weekend, I really hate crowds.  So excited to get my popcorn on...I used to work at a movie theater but man I just can stop loving movie theater popcorn...no butter though that crap is like liquid grease.  I so excited to see Hunger Games I have heard nothing but great things about it, my best friend even said it was as epic as the last Harry Potter...well you cant really compare the 2 but Harry Potter 8 is always a good benchmark for greatness that movie was epic and I cant get enough of it.  Well my BFF loves Harry Potter as much as I do, in fact we saw the last movie together, so if she says its awesome than I totally believe her and cant wait to go see it.

And now for something completely different...I made this sorbet last weekend and thank goodness I did because it has been a life saver through my sore throat days.  Its so smooth and cool but has no dairy so its doesnt bother my stomach.  Oh and the best part its super scoopable so you dont have to defrost this any you can easily scoop from the container...see

It makes those perfect icecream scoops that I love but can usually never get because the icecream is too hard, I think the secret is actually the alcohol since alcohol never really freezes it keeps the icecream from solidifying...probably am going to add a dash of vodka to future icecream to see if that helps with the scoopable-ness (yeah I just made that word up, Im awesome like that).  So not only is this the perfect sorbet for a sore throat, its really an awesome spring/summer sorbet because its so cool and refreshing and doesnt make you feel like you ate a whole creamery when your done.  So what are you waiting for, go try this now!

Grape & Pink Champagne Sorbet
(A Le Delicieux recipe)

Servings: 2qt        Prep time: 5 min           Cook time: 10 min             Difficulty: Easy

Ingredients
  • 550g of black seedless grapes
  • 1 cup of pink Champagne (or regular Champagne, I used the $4 bottle of extra dry white)
  • 1/2 cup of sugar
  • juice of 1 lemon

Instructions
Place the grapes, pink Champagne and sugar in a saucepan over a medium low heat. Bring to the boil and reduce to a simmer. Reduce heat to low and simmer for 10 minutes or until the skins of the grapes split.

Drain through a fine sieve into a large jug or bowl and use the back of a wooden spoon to press the grapes to release their juices. Extract as much from the grapes as you can. Cover the mixture and refrigerate until completely cold. I usually leave the mixture overnight. **I drained the grapes through a colander and used a mash potato masher to get all the juices out.  I let the pressed grapes sit for a while and drained them again to get all the juices, its ok if some skins get in there you'll just have to eat them in your sorbet :)

Remove the mixture from the refrigerator and add the lemon juice and pour into your ice cream maker and churn according to your manufacturers instructions. The longer you churn the sorbet the lighter in colour it will become.  I forgot to add the lemon juice until it was almost done but I think it just adds a little extra zip to it so its ok if you forget this part.

Notes
Once you have cooked the grapes you will notice the mixture is incredibly dark. Don’t worry because the sorbet will lighten when it is churned in the ice cream maker.

Really easy right?!  I think I was making dinner at the same time as I was making this so you can see how easy it was.  So go try it and let me know how it turns out for you!

Friday, March 16, 2012

Foodie Friday

Happy Friday yall!  Im so excited for this weekend because Im going to the Houston Rodeo and we are FINALLY going to see Alan Jackson!  So psyched!  Even better its going to be a nice weekend (unlike last weekend when it was a non stop rain) so we will get to see all the rodeo has to offer yay!  I have to say being from Texas...and Houston on top of that I think we have the best rodeo but I have come to realize while our rodeo lasts 4 weeks its not the biggest.  Shocking I know!  The largest Rodeo is actually in Las Vegas but thats only because its the finals.  Each rodeo has their own finals but the rodeo in Las Vegas brings all the champions from the other states and they compete there.  The Las Vegas rodeo though is only 3 days but it sells out the entire city...I know I used to work there.  Crazy times...but while Vegas may be the ultimate finals...Texas has the best BBQ, the best concerts and the best people.  YEE-HAW!  Sorry I had to throw that in there.

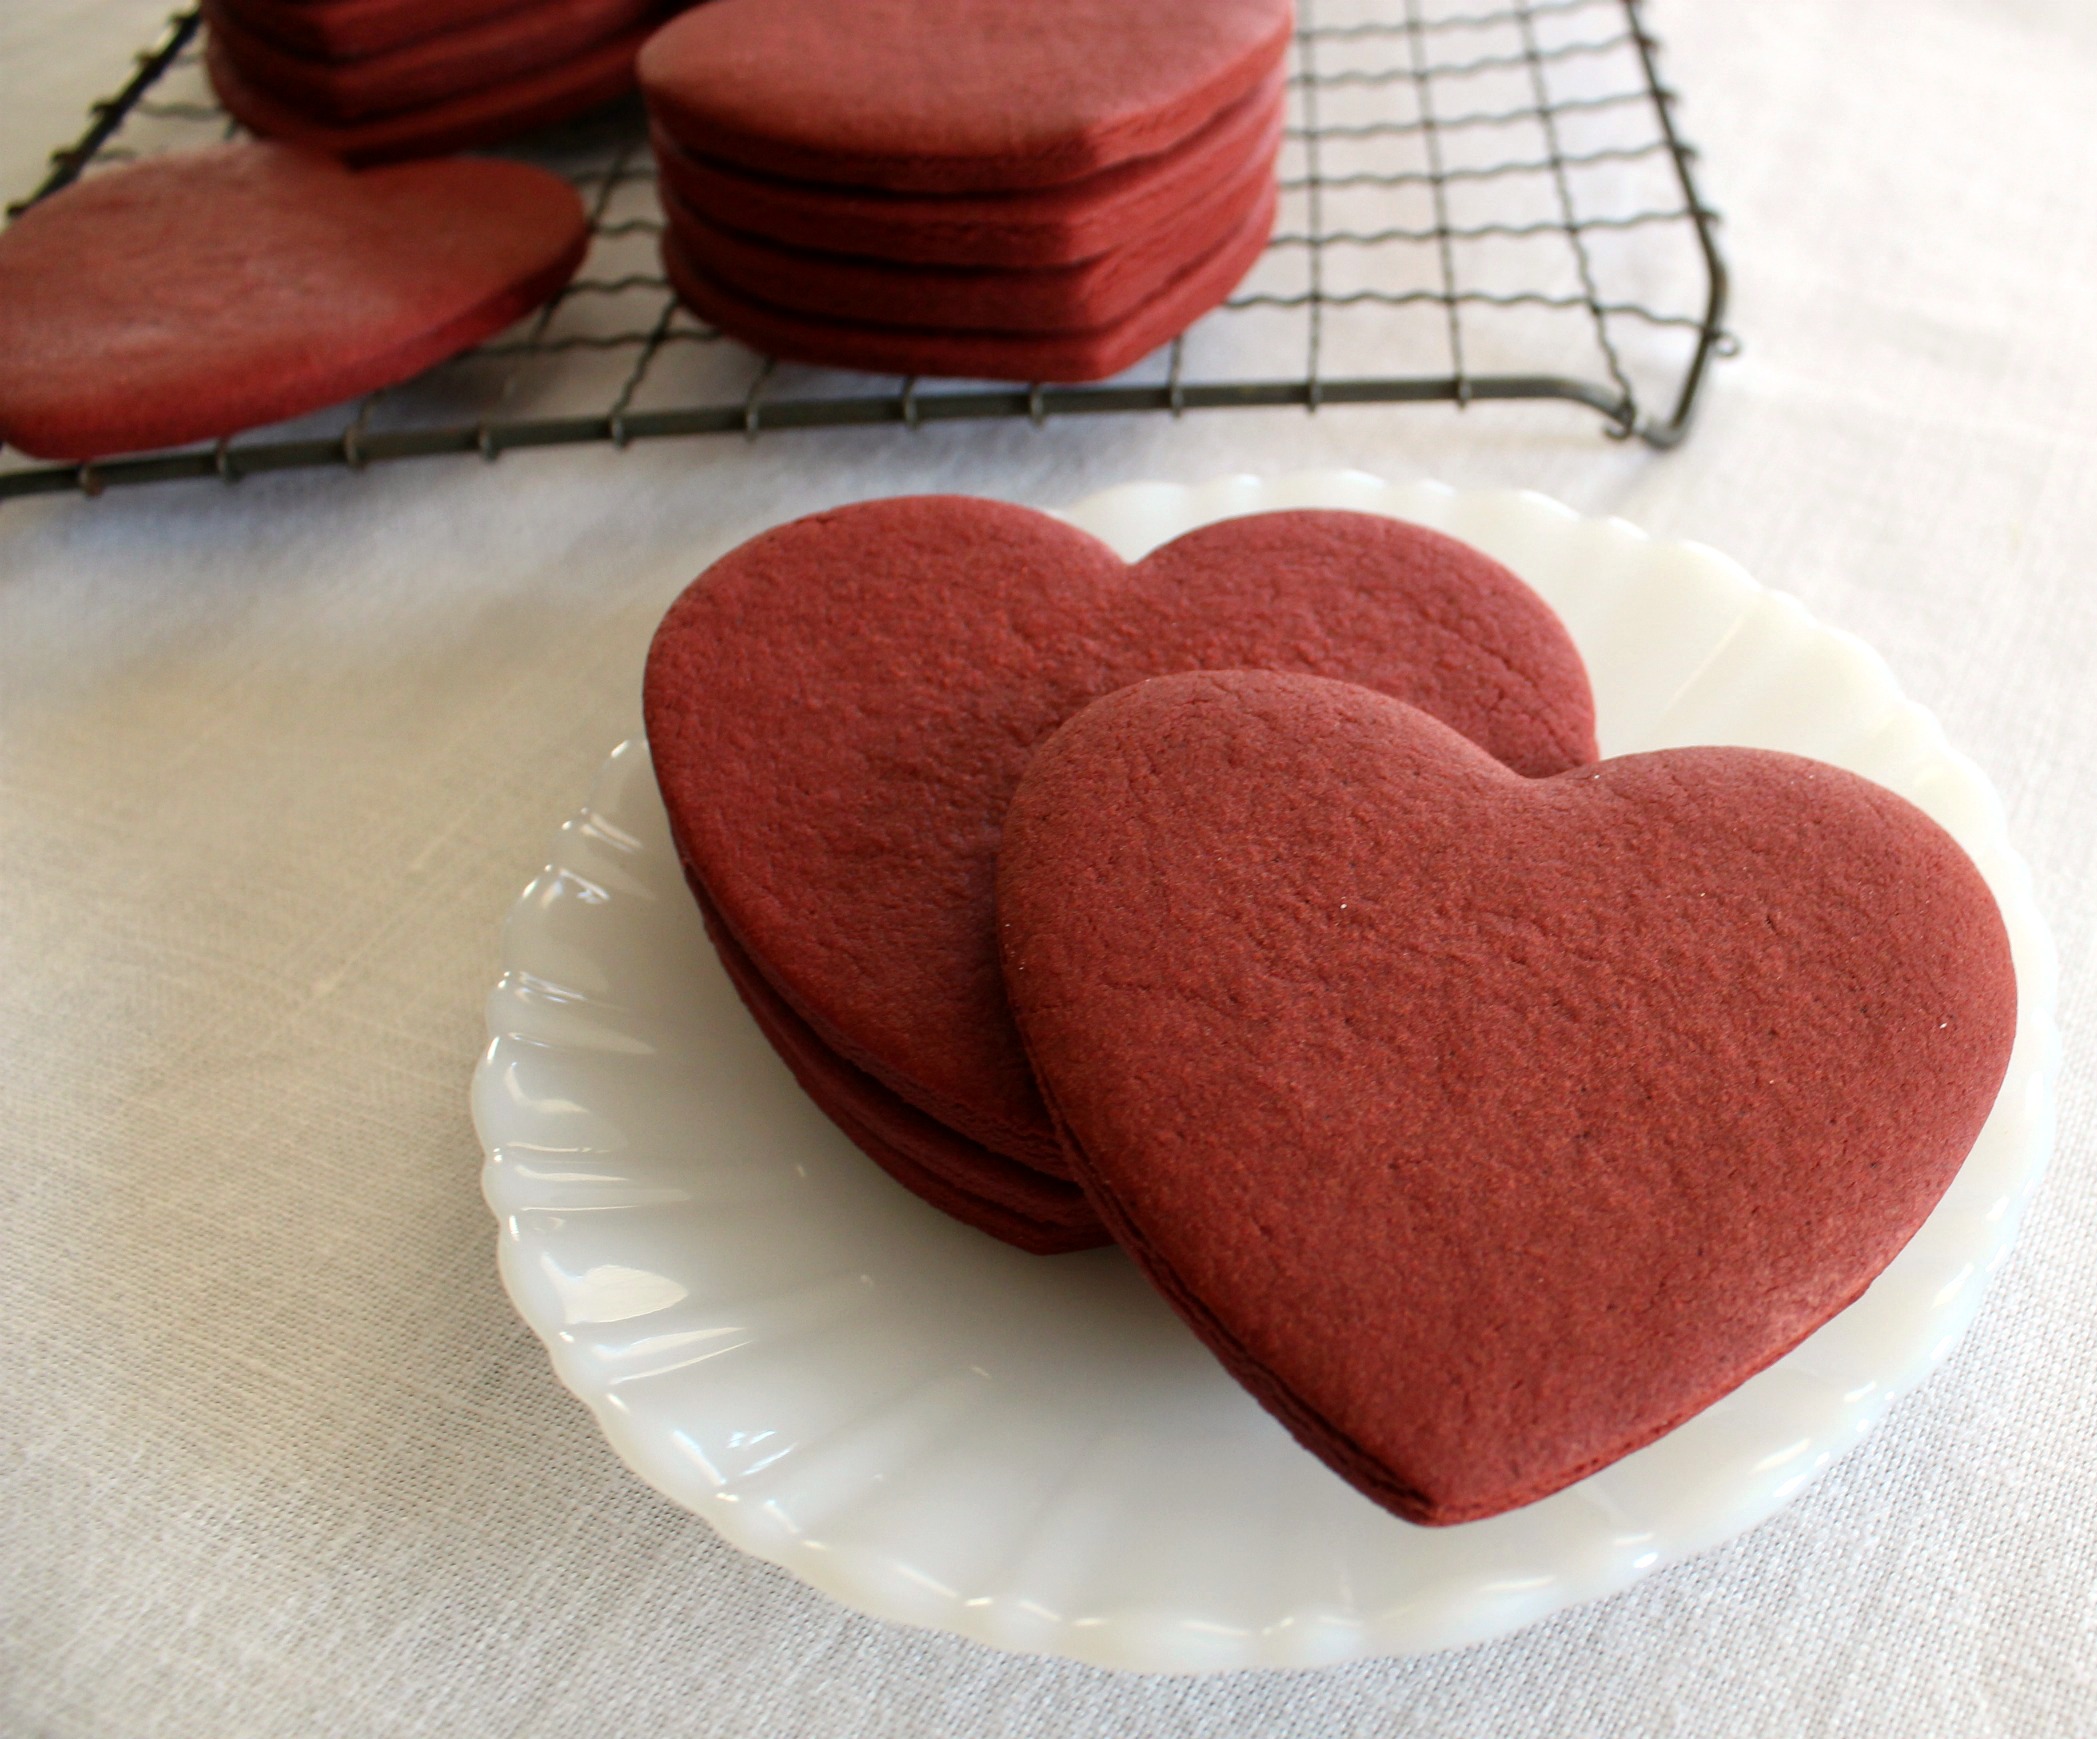
Today's recipe has nothing to do with the rodeo or BBQ but really valentine's day.  I wanted to make these cookies for Valentine's day but it took me FOREVER to fine some of the emulsions the recipe called for.  I took 2 of them out (they were for the icing anyway) so it shoudnt be too hard to make this.  I have made Red Velvet drop cookies before but honestly I dont really like drop cookies they are messy and goopy.  I love cut-out cookies because of all the shapes you can make and this was that recipe.  When I ate these I dont know what I was expecting but they are really tasty but they do taste like a perfect mix between a cookie and a cake.  What that means is they are dry but soft at the same time and man if you dont have milk you will need some!  I enjoyed these cookies, they didnt take too long to make which is always a plus so I hope you enjoy them too!
Red Velvet Cookies
Servings: 3dzn      Prep Time: 10min       Cook Time: 6-7min            Difficulty: Easy

Ingredients

·         1 cup unsalted butter
·         2 cups confectioners sugar
·         1 egg
·         2 tsp vanilla bean paste {or extract, I love the paste it has a stronger flavor}
·         1 tbsp Lorann red velvet emulsion
·         2-3 tbsp milk
·         1/2 cup Hershey’s Cocoa powder
·         1/4 cup buttermilk powder
·         3 1/4 cups all-purpose flour
·         2 tsp baking powder
·         1/2 tsp salt
·         splash {about 1/2 a tsp} apple cider vinegar

Instructions

Preheat oven to 400degrees
Cream together butter and confectioners sugar. Add the egg, vanilla, red velvet emulsion, and milk and mix well. Start with 2 tablespoons of milk, then add the rest if the dough is a little dry after adding the flour mixture. Sift together the cocoa, buttermilk powder, flour, baking powder and salt and add to the wet ingredients. As the dough begins to form add a splash of apple cider vinegar. The dough should be soft but not sticky.
After mixing, let it rest for five to ten minutes, then roll out on lightly floured surface to 1/4 inch thickness. Cut into desired shapes and bake for 6-7 minutes.
Makes about 3 dozen 3 1/2 inch cookies

**Notes**
I tried using royal icing with butter vanilla emulsion but I think a cream cheese frosting would be better.  Royal icing gets hard which is great for storage but I think the cream cheese frosting would taste better.  I've never made a cream cheese cookie frosting before so I dont have a recipe for that but I have a royal icing recipe below if you want to do that.

Royal Icing
(A Bake at 350 blog recipe)
Servings: 2-3dzn          Prep Time: 10min        Cook Time:       Difficulty: Moderate

Ingredients
·         4 TBSP meringue powder   (I use wilton)
        1 lb powdered sugar         
        ½ - 1 tsp light corn syrup
·         Scant* 1/2 c. water             
       food coloring if desired
       1/2 tsp extract of your choice (I use vanilla normally)

Instructions
Combine the meringue powder and water. With the paddle attachment of an electric mixer, beat until combined and foamy.  Sift in the powdered sugar(I have skipped this and it was ok just not as smooth) and beat on low to combine.  Add in the corn syrup and extract if desired. (I think the corn syrup helps keep the icing shiny.)
Increase speed to med-high/high and beat for about 5 minutes, just until the icing is glossy and stiff peaks form.  (You should be able to remove the beater from the mixer and hold up and jiggle without the peak falling.) Do not overbeat.
Cover with plastic wrap touching the icing or divide and color using gel paste food colorings.
*A scant cup is a measuring cup not filled all the way up to the top.


If you do want to try a Cream Cheese Frosting I have one from Crazy for Crust that I havent tried but they make some amazing desserts over there so Im sure its great.

For the Cream Cheese Frosting:
·         8oz cream cheese, softened
·         ½ c butter, softened
·         4c powdered sugar
·         1 tsp vanilla extract

   I Instructions
    Make the frosting: Using a hand mixer, cream butter and cream cheese until fluffy. Slowly add in powdered sugar and vanilla. Mix until smooth


   I hope you enjoyed this recipe today, and yay Im trying to take better pictures, I even broke out my wedding china for you guys!


    Project Housewife Out!


   Im Linking Up!  Come check me out at While He Was Napping, Serenity Now, Petals to Picots, Bacon Time, Addicted2Decorating, Six Sisters Stuff, Add A Pinch, A Bowl Full of Lemons, Tip Junkie, Crazy for Crust, Not Just a Housewife, Ginger Snap Crafts, Southern Lovely, My Girlish Whims, Lil Pink Pocket, Made Famous By, Beyond the Picket Fence, DIY by Design


Friday, March 2, 2012

Foodie Friday

Im trying not to be lame but you know I have the Friday song running through my head right now but I will spare you since it seems to be my go-to opener on Fridays :)

Im sad to say this but I havent been crafty this week, this waking up early business is really throwing off my chi but I have been cooking and eating some pretty amazing food.  Ok by amazing I mean easy and if its quick and easy then it awesome by me.  However I have been craving berries this week so I'm going to share with you a trifle recipe that I made (not easy by the way) from the Food Network that is awesome and delicious and you wont want to stop eating.  Check it!


Lemon Curd Trifle with Fresh Berries
(A Food Network recipe)
Servings: 6       Prep Time: 30min    Cook Time: 10min    Chill:3hrs     Difficulty: Moderate


Ingredients
·         6 large egg yolks                                                  •1pint fresh blueberries
·         1 cup sugar                                                           •1pint fresh blackberries
·         4 lemons, zested and juiced                              •2c whipped cream
·         1/2 cup (1 stick) unsalted butter in chunks    •1 prepared lemon cake, sliced
·         1 pint fresh strawberries, halved lengthwise • ¼ c limoncello or grand marnier (optional)
·         Fresh mint leaves, for garnish

Instructions
 
To make the lemon curd: Bring a pot of water to a simmer over medium-low heat. Combine the egg yolks, sugar, lemon juice, and zest in a metal or glass heat-resistant bowl and whisk until smooth. Set the bowl over the simmering water, without letting the bottom touch, and continue to whisk. Keep working-out that arm and whisk it vigorously for a good 10 minutes, until the curd has doubled in volume and is very thick and yellow. Don't let it boil. Remove the bowl from heat and whisk in the butter, a couple of chunks at a time, until melted. Refrigerate until the custard is cold and firm.

To build the trifle: put the berries in a mixing bowl and toss them together so they are evenly distributed. Fold the whipped cream into the chilled lemon curd to lighten it up into a mousse. Line a glass trifle bowl with pieces of pound cake to fit. Drizzle or brush the cake with the Limoncello, spoon a layer of the lemon curd over the cake, and then a layer of mixed berries. Repeat the layers until the ingredients are used up, the last layer looks best if it's the berries. Chill before serving. Garnish with fresh mint. 

This dessert is so tasty and so refeshing and not heavy at all.  The lemon curd was a little hard for me only because Ive never done anything fancy like that before and I was so proud of myself for it.  So go try it out and let me know what you think, I hope you love it just as much as I did!

Tuesday, February 28, 2012

Pin-Stration

Going off of yesterday's pinterest post...we all have like a million pins on pinterest but dont end up doing hardly any of them.  I decided that Im going to share with you some of the things Ive made that have been inspired by something I pinned on pinterest.  The first pin-stration (pin inspiration...you get it right lol) I want to share with you is something I was actually a little reluctant to pin in the first place. 

Let me explain...while I have an awesome dog named Oreo, Im really not a huge fan of the cookie itself.  I know Im weird, but another shocker is Im not really a huge fan of chocolate in general.  So it was with a little reluctance that I pinned "Birthday Oreo Stuffed Brownies".  Main reason I pinned these is because...Birthday Cake Oreos?!?  That sounds awesome actually, and the other reason...its from Bake at 350 blog and I love that girl and her awesome blog.  Love of Harry Potter aside she has some great desserts over there, so go check her out.  On to the pin...

Like I said its Birthday Oreo Stuffed Brownies but I have a confession, I love to take short cuts when it comes to brownies.  As I said I dont love chocolate so I dont love making that from scratch, plus a brownie mix box is only like $2 so why bother!  Of course Bridget has an awesome brownie recipe that Im sure is awesome and if you love chocolate should try it. Here is the recipe so you can see for yourself...oh and a link to the actual post so you can see all her awesome pictures.

Birthday Cake Oreo-Stuffed Brownies
{from bakeat350.blogspot.com}

1 cup dutch-process cocoa (such as Hershey's Dark)
1 tsp. coarse salt
1/2 tsp. baking powder
3/4 c. unsalted butter
2 cups sugar
1 TBSP vanilla
3 eggs, lightly beaten with a fork
1 cup unbleached, all-purpose flour
20 Birthday Cake Oreos (or regular Oreos)
1 tsp. corn syrup
1 tsp. water
sprinkles

Preheat oven to 325.  Grease a 9x13" baking pan.  

In a medium bowl, whisk together the cocoa powder, salt, and baking powder.  Set aside.

In a medium saucepan, heat the butter over medium-low, until melted.  Add the sugar and stir to combine.  Continue heating about 1-2 minutes, until hot.  

Remove the pan from the heat and add the cocoa mixture, stirring until combined.  Add the eggs and vanilla; stir until totally combined.

Add the flour and stir again until smooth.  

Spread half of the batter into the prepared pan.  Top with 20 Oreos.  Cover with the remaining batter; spread gently with an offset spatula.

Bake for about 30 minutes, until the brownies are done, but the center still looks soft.

{The Oreos will make the brownies a little bumpy....that's ok.}

Set the pan on a wire cooling rack and let cool 10 minutes.  Meanwhile, stir together the corn syrup and water.

After 10 minutes, lightly brush the corn syrup mixture onto the cooled brownies.  Scatter on the sprinkles.  (Adding them before baking will cause the sprinkles to discolor and become misshapen.)

Let the brownies cool completely before cutting.  (A bench scraper is the perfect tool for cutting brownies.)


For the brownie mix from a box the 9x13 baking dish, in my opinion was a little too big so if you have one size smaller you should use that.  Check out the "awesomeness" that is my brownies.

 So you can see by awesome I dont mean pretty, the awesome really refers to the tastyness.  Dont judge a book by its cover right!  See there isnt enough brownie mix to cover all the tops of the Oreos so thats why I say use the smaller pan so you can make them a little thicker.


You cant see the Oreo until you bite into it but trust me its there and its tasty.  I know its not the best picture, but I wasnt planning on doing this post then last minute (ok today) decided I put this up here.


Get out there and try it...or just try something from your Pinterest boards, Im sure we all have a lot to choose from (easiest to try is food...just sayin!).


Project Housewife Out!