Stay Connected

Photobucket Photobucket Photobucket

Friends

Grab A Button

Photobucket

Search This Blog

Blog Lovin'

Easy Blog Tips!
TCBOTB
Powered by Blogger.
Showing posts with label friday. Show all posts

Friday, April 27, 2012

Foodie Friday #23

Its Friday and Im super excited about it!  I started my new job this week but am happy for the weekend to finally be here and take some down time to...wait for it...FINISH THE SIGN...if you dont know what Im talking about then just tune in Monday because shock of shock I will finally be posting the epic conclusion to this masterpiece.  I have to say my husband is extremely talented and it looks fantastic!

For the recipe this week, I made these for my new work buddies but ended up eating them all myself.  Possibly next time I will leave out the Peanut Butter because they were pretty hard not as melty as I normally like my Krispie Treats.  I am a sucker for Butterfinger though and had to try these and were overall totally in love.  Try these out and let me know what you think!

Butterfinger Rice Krispie Treats
(A RecipeGirl blog recipe, modified by Rachael S)


Servings: 9     Prep Time: 25min     Cook Time: 5min            Difficulty: Easy

Ingredients
  • 1 tablespoon salted butter
  • 1/4 cup creamy peanut butter
  • 1 bag large marshmallows
  • 4 cups Rice Krispies
  • 8 pack of .65-ounce Butterfinger candy bars chopped into chunks
Instructions
 Spray an 8x8-inch pan with nonstick spray.

In a large saucepan, melt the butter and peanut butter together over medium heat. Add the marshmallows- stir until melted. Remove from heat and stir in the Rice Krispies. Stir in the Butterfingers (setting about 1/4 cup aside for the topping). Scrape the mixture into the prepare pan and press it evenly into the pan with clean hands. Let it cool.

Cut the Krispie Treats into nine equal pieces and store them in a covered container. 

What are you waiting for, go try these out an be prepared to want to eat them all!

Friday, April 6, 2012

Foodie Friday #20


Happy Good Friday/Passover everyone!  Im sure you have all seen the million and one Easter food posts around the blog-osphere and on Pinterest.  Well I dont really have one for you today mainly because my mom is doing Easter this year so I didnt have to think about what to cook this year.  The recipe I am sharing with you today I did make this past Christmas and they tasted awesome...but make sure you read the note at the bottom of the recipe for notes on yeast and bread rising.  

These rolls are great for any occasion, although I really dont like to make homemade bread unless family is coming over...its a lot of work for everyday cooking, for me at least.  So without further ado, I present to you Cinnamon-Glazed Butterhorns!!

Cinnamon-Glazed Butterhorns
(A Taste of Home recipe)
Servings: 24       Prep Time: 35min     Rise Time: 1hr   Cook Time: 15min     Difficulty: Moderate

 (source)


Ingredients
·         1 package (1/4 ounce) active dry yeast (not instant)
·         ¼ cup warm water (110° to 115°)
·         1 cup warm milk (110° to 115°)
·         ½ cup butter, melted
·         ¼ cup sugar
·         1 egg
·         ¾ teaspoon salt
·         4 to 4-1/4 cups all-purpose flour
Glaze:
·         3 tablespoons butter
·         1 cup confectioners’ sugar
·         ¾ teaspoon ground cinnamon
·         1 teaspoon pure vanilla extract
·         1 to 2 tablespoons hot water

Instructions
In a large bowl, dissolve yeast in warm water. Add the milk, butter, sugar, egg, salt and 2 cups flour; beat until smooth. Add enough remaining flour to form a soft dough.

Turn onto a floured surface; knead until smooth and elastic, about 6-8 minutes. Place in a greased bowl, turning once to grease top. Cover and let rise in a warm place until doubled, about 1 hour.

Punch dough down. Turn onto a lightly floured surface; divide in half. Roll each portion into a 12-in. circle; cut each circle into 12 wedges. Roll up wedges from the wide end and place point side down 2 in. apart on greased baking sheets. Curve ends to form a crescent.

Cover and let rise in a warm place until doubled, about 30 minutes. Bake at 350° for 12-15 minutes or until golden brown. Remove from pans to wire racks.

For glaze, heat butter in a small saucepan until golden brown; remove from the heat. In a bowl, whisk the confectioners’ sugar, cinnamon, vanilla and browned butter until smooth. Whisk in enough hot water to achieve spreading consistency. Brush over warm rolls.

**Notes** When I made this my dough didnt rise at all...I seem to have a hard time with that and its probably due to the quality of yeast I use, I hear great things about King Arthur yeast.  But as I said this dough didnt rise but I still cooked them anyway.  They didnt have the fluffy texture that crescent rolls normally have but the flavor was great.  Dont throw it out just because it doesnt rise, try to bake it and see what happens.  Also...sometimes the yeast doesnt rise because the water is either too hot or not hot enough.  If you are an expert with yeast then no worries but for beginners I recommend using a thermometer to get the right temp that should help with the rising issue as well.

Nutrition
1 roll equals 160 calories, 6 g fat (4 g saturated fat), 24 mg cholesterol, 118 mg sodium, 24 g carbohydrate, 1 g fiber, 3 g protein. 

Friday, March 16, 2012

Foodie Friday

Happy Friday yall!  Im so excited for this weekend because Im going to the Houston Rodeo and we are FINALLY going to see Alan Jackson!  So psyched!  Even better its going to be a nice weekend (unlike last weekend when it was a non stop rain) so we will get to see all the rodeo has to offer yay!  I have to say being from Texas...and Houston on top of that I think we have the best rodeo but I have come to realize while our rodeo lasts 4 weeks its not the biggest.  Shocking I know!  The largest Rodeo is actually in Las Vegas but thats only because its the finals.  Each rodeo has their own finals but the rodeo in Las Vegas brings all the champions from the other states and they compete there.  The Las Vegas rodeo though is only 3 days but it sells out the entire city...I know I used to work there.  Crazy times...but while Vegas may be the ultimate finals...Texas has the best BBQ, the best concerts and the best people.  YEE-HAW!  Sorry I had to throw that in there.

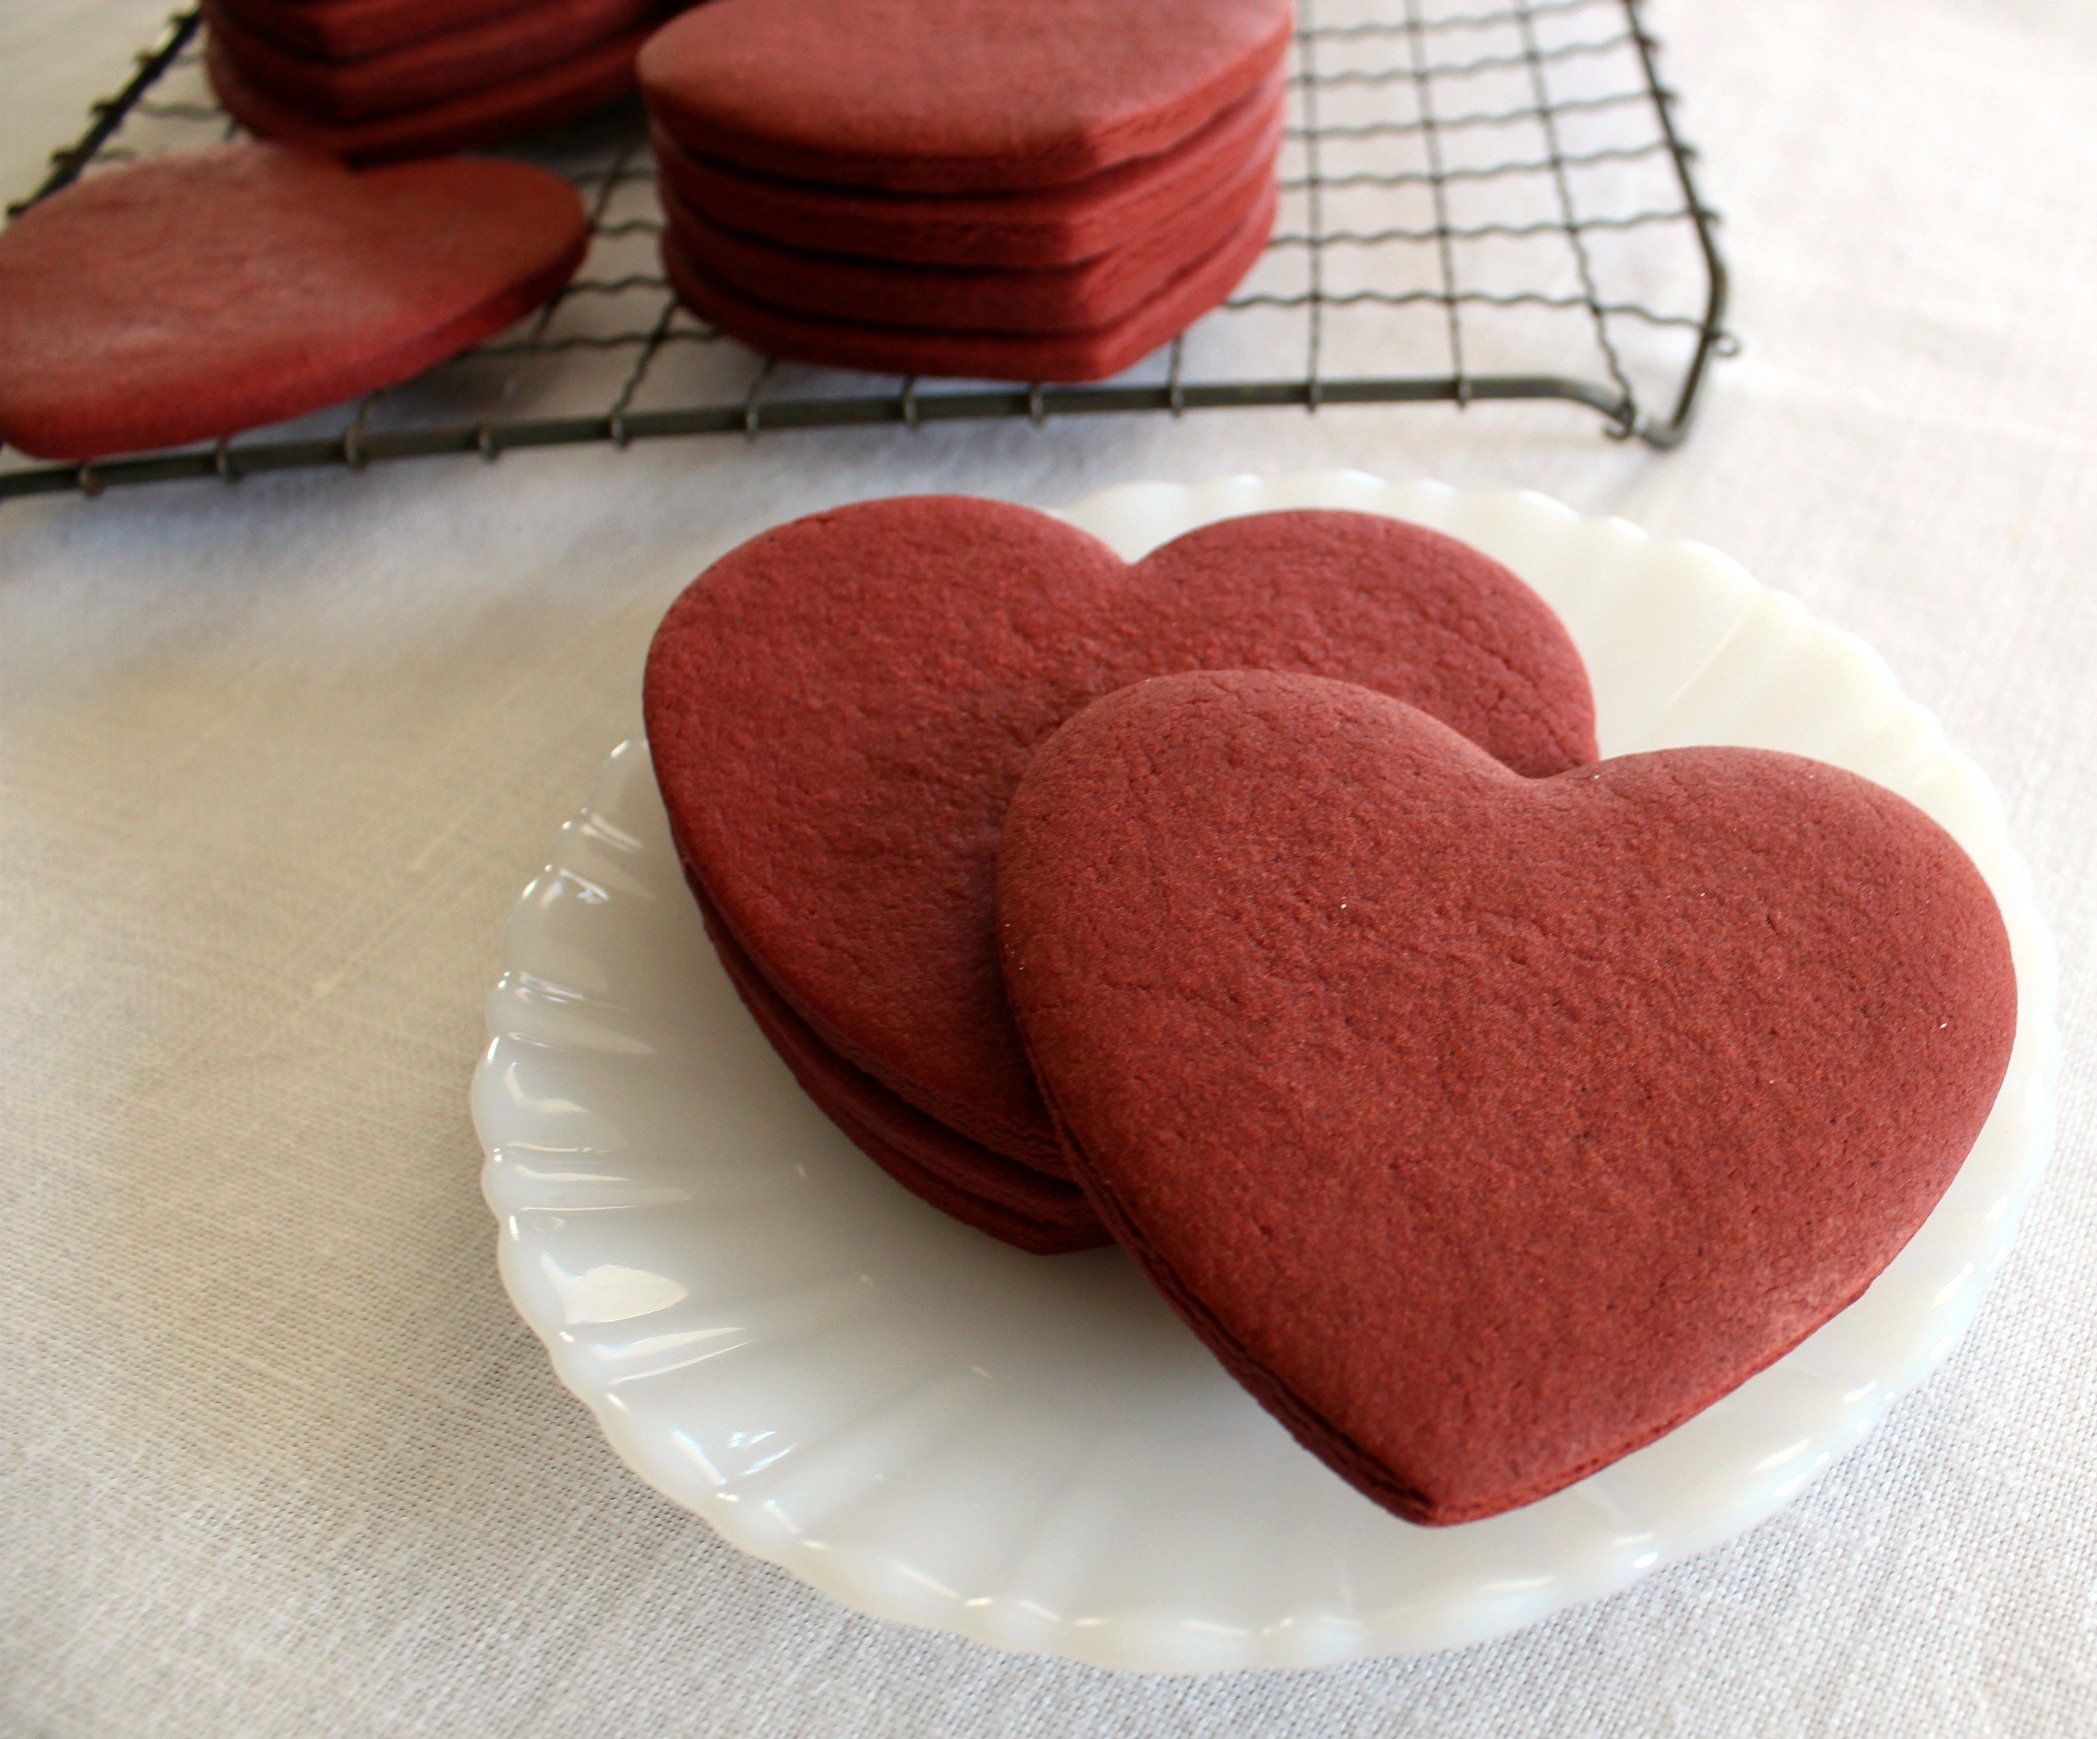
Today's recipe has nothing to do with the rodeo or BBQ but really valentine's day.  I wanted to make these cookies for Valentine's day but it took me FOREVER to fine some of the emulsions the recipe called for.  I took 2 of them out (they were for the icing anyway) so it shoudnt be too hard to make this.  I have made Red Velvet drop cookies before but honestly I dont really like drop cookies they are messy and goopy.  I love cut-out cookies because of all the shapes you can make and this was that recipe.  When I ate these I dont know what I was expecting but they are really tasty but they do taste like a perfect mix between a cookie and a cake.  What that means is they are dry but soft at the same time and man if you dont have milk you will need some!  I enjoyed these cookies, they didnt take too long to make which is always a plus so I hope you enjoy them too!
Red Velvet Cookies
Servings: 3dzn      Prep Time: 10min       Cook Time: 6-7min            Difficulty: Easy

Ingredients

·         1 cup unsalted butter
·         2 cups confectioners sugar
·         1 egg
·         2 tsp vanilla bean paste {or extract, I love the paste it has a stronger flavor}
·         1 tbsp Lorann red velvet emulsion
·         2-3 tbsp milk
·         1/2 cup Hershey’s Cocoa powder
·         1/4 cup buttermilk powder
·         3 1/4 cups all-purpose flour
·         2 tsp baking powder
·         1/2 tsp salt
·         splash {about 1/2 a tsp} apple cider vinegar

Instructions

Preheat oven to 400degrees
Cream together butter and confectioners sugar. Add the egg, vanilla, red velvet emulsion, and milk and mix well. Start with 2 tablespoons of milk, then add the rest if the dough is a little dry after adding the flour mixture. Sift together the cocoa, buttermilk powder, flour, baking powder and salt and add to the wet ingredients. As the dough begins to form add a splash of apple cider vinegar. The dough should be soft but not sticky.
After mixing, let it rest for five to ten minutes, then roll out on lightly floured surface to 1/4 inch thickness. Cut into desired shapes and bake for 6-7 minutes.
Makes about 3 dozen 3 1/2 inch cookies

**Notes**
I tried using royal icing with butter vanilla emulsion but I think a cream cheese frosting would be better.  Royal icing gets hard which is great for storage but I think the cream cheese frosting would taste better.  I've never made a cream cheese cookie frosting before so I dont have a recipe for that but I have a royal icing recipe below if you want to do that.

Royal Icing
(A Bake at 350 blog recipe)
Servings: 2-3dzn          Prep Time: 10min        Cook Time:       Difficulty: Moderate

Ingredients
·         4 TBSP meringue powder   (I use wilton)
        1 lb powdered sugar         
        ½ - 1 tsp light corn syrup
·         Scant* 1/2 c. water             
       food coloring if desired
       1/2 tsp extract of your choice (I use vanilla normally)

Instructions
Combine the meringue powder and water. With the paddle attachment of an electric mixer, beat until combined and foamy.  Sift in the powdered sugar(I have skipped this and it was ok just not as smooth) and beat on low to combine.  Add in the corn syrup and extract if desired. (I think the corn syrup helps keep the icing shiny.)
Increase speed to med-high/high and beat for about 5 minutes, just until the icing is glossy and stiff peaks form.  (You should be able to remove the beater from the mixer and hold up and jiggle without the peak falling.) Do not overbeat.
Cover with plastic wrap touching the icing or divide and color using gel paste food colorings.
*A scant cup is a measuring cup not filled all the way up to the top.


If you do want to try a Cream Cheese Frosting I have one from Crazy for Crust that I havent tried but they make some amazing desserts over there so Im sure its great.

For the Cream Cheese Frosting:
·         8oz cream cheese, softened
·         ½ c butter, softened
·         4c powdered sugar
·         1 tsp vanilla extract

   I Instructions
    Make the frosting: Using a hand mixer, cream butter and cream cheese until fluffy. Slowly add in powdered sugar and vanilla. Mix until smooth


   I hope you enjoyed this recipe today, and yay Im trying to take better pictures, I even broke out my wedding china for you guys!


    Project Housewife Out!


   Im Linking Up!  Come check me out at While He Was Napping, Serenity Now, Petals to Picots, Bacon Time, Addicted2Decorating, Six Sisters Stuff, Add A Pinch, A Bowl Full of Lemons, Tip Junkie, Crazy for Crust, Not Just a Housewife, Ginger Snap Crafts, Southern Lovely, My Girlish Whims, Lil Pink Pocket, Made Famous By, Beyond the Picket Fence, DIY by Design


Friday, March 9, 2012

Foodie Friday!

Calling all Harry Potter fans!!!  Movie fans that is (well ok if you love the books you probably love the movies).  We all remember Lucius Malfoy or as regular people call him Jason Isaacs.  Did you know he is now staring in "AWAKE"!!  What!!  I saw the prewiew episode a while back and he looked familar but couldnt pace him.  It wasnt until I was watching (again) the special features on the last Harry Potter and they showed Lucius without the wig that I was yelling for Joe to come look at the screen.  Well my silly husband thinks that John Hamm and Jason Isaacs are the same person (well I have to give him that they look a lot a like) so he wasnt surprised but whatever I was and had to share that with you.  I am really enjoying AWAKE its different and with this last episode I can see how they are going to make the plot a little more interesting moving forward.  Since I love all the actors from Harry Potter I now HAVE to watch this show to support my peeps but it helps that its a good show too :)

I feel so much better having shared that with you but wait there's more.  Its Friday and what kind of person would I be if I didnt share a delicious recipe with you!  This one comes from Spicy Perspective but I made some changes to it because I cant eat bacon (too much grease).  I made notes at the bottom of what I changed so you can change it back if you want, and the link to the original is below as well so you can go to their site and give them some props for this great recipe.  My picture is actually of the leftovers I had yesterday and they are just as good leftover as they are fresh and for my family thats important.

So without further ado...my I present to you...
Southern Shrimp and Grits
(A SpicyPerspective blog recipe, modified by Project Housewife!)


Servings: 4       Prep Time: 15min    Cook Time: 15min        Difficulty: Easy

Ingredients
For the Shrimp:                                               For the Grits:
·         1 lb. shrimp, peeled and deveined                           •1c instant grits
·        salt and pepper                                                        •3tbsp butter
·         ½ lemon, juiced                                                       •2c shredded fontina cheese (6oz block)
·         2-3 Tb. chopped parsley                                          •Cayenne pepper
·         1 small bunch chopped green onions (3/4 cup)
·         1 large garlic clove, minced


Instructions
In a medium saucepan, bring 4 cups of water to a boil. Add grits, ¾ tsp. salt and ¼ tsp. pepper. Whisk well to avoid clumping. Reduce heat to lowest setting and cook until water is absorbed, 10-12 minutes. Remove from heat and stir in butter, cheese and 2-3 dashes of cayenne pepper. Cover until ready to serve.

In a sautee pan, add a dash of oil then add shrimp and a dash of cayenne pepper.  sauté until pink—about 3 minutes. Immediately add onions, garlic, parsley and lemon juice. Toss and remove from the heat.

Divide grits onto plates and top with the shrimp mixture.

The original recipe calls for bacon but I dont like all that grease so I left that out.  Im sure you could use sharp cheddar rather than the fontina but I always like to use the original recipe ingredients before I change it too much.  If you want more or less spicyness you just add more or less cayenne pepper.  I dont like really spicy food so I didnt add too much to mine.


Well I hope you enjoy this recipe I know we sure did!


Project Housewife Out!

Im Linking up!  Come check me out at While he was Napping, Serenity Now, Petals to Picots, Bacon Time, Addicted2Decorating, Six Sisters Stuff, Add A Pinch, Not Just a Housewife, Tip Junkie, A Bowl Full of Lemons, Lil Pink Pocket, Southern Lovely, My Girlish Whims, Ginger Snap Crafts, Serenity Now

Friday, February 24, 2012

Foodie Friday

Happy Friday everyone!  Its Go Texan Day at work so that means I get to wear my boots and jeans and rodeo clothes.  Only in Texas right :)  Im just happy to get to wear jean to work so Im not going to complain.

More good news on this friday...I have a super easy super delicious recipe to share today!  I dont know about you but I used to get the daily recipes from Campbells to try and inspire me to cook...it didnt really work but it did give me a huge folder full of Campbells easy recipes.  Today Im going to share one with you.  Its called Pineapple-Picante Stir-Fry Pork and Cabbage, but I used chicken rather than pork, mainly because Im not a huge fan of pork.  I made this the other day and loved it for its simplicity and its also pretty great leftover, which is also important to me too.  Try it out and let me know what you think!


Pineapple-Picante Stir-Fried Pork and Cabbage
(A Campbells Kitchen recipe)


Servings: 4      Prep Time: 20min    Cook Time: 30min      Difficulty: Easy

Ingredients
·         1 cup Pace® Picante Sauce
·         1 tablespoon rice vinegar
·         2 tablespoons minced peeled fresh ginger root I used 1tbsp ground ginger but I dont really like ginger and even that was too much)
·         1 can (8 ounces) pineapple chunks in juice, drained, reserving juice
·         1 tablespoon cornstarch
·         2 tablespoons vegetable oil
·         1 boneless pork tenderloin (about 1 pound), cut into thin strips
·         1 medium head green cabbage, cut in quarters and very thinly sliced
·         1/4 cup water 

Instructions
Stir the picante sauce, vinegar, ginger root, pineapple juice and cornstarch in a medium bowl.

Heat 1 tablespoon oil in a 12-inch skillet over medium-high heat.  Add the pork and stir-fry until well browned.  Remove the pork from the skillet.

Heat the remaining oil in the skillet.  Add the cabbage and stir-fry until tender-crisp.  Add the water and cook for 5 minutes, stirring occasionally.  Remove the cabbage from the skillet and keep warm.

Add the picante sauce mixture to the skillet.  Cook and stir over medium heat until the mixture boils and thickens.  Stir in the pineapple chunks.  Return the pork to the skillet and cook until the mixture is hot and bubbling.  Serve the pork mixture over the cabbage.

Pretty easy and tasty too.  You could always use rice rather than cabbage but I think that the cabbage makes a nice change to rice.  Pace really isnt tangy enough but its thickness does well in the sauce.  What variations are you going to try?

Friday, February 17, 2012

Foodie Friday

Greeting all.  I have a confession, its a little hard to think of a recipe when your watching John Stewart...I mean he keeps distracting me with the funny funny jokes :)  But let be serious, I have my priorities straight and know we all want some food knowledge dropped on us.  I think Im going to go back to sweets this week, Ill try and switch weeks savory and sweet and since last week was savory this week is sweet...sweet :)  Sorry I couldnt help it.

I love this fudge, I hate chocolate but I love this fudge.  Its not too sweet or heavy, and...BEST PART...its Weight Watchers friendly so no guilty conscience after you eat one!  I mean honestly dont think any of us need an excuse to eat fudge, but just in case you do there you have it!  I hope you enjoy this fudge as much as I do...oh and did I mention its super easy to make...because it is!


Chocolate Marshmallow Fudge

(A Weight Watchers recipe)

Points: 3      Servings: 36       Prep Time:10min      Cook Time: 5min     Difficulty: Easy

Ingredients
·         1 2/3 cup(s) sugar    
·         2/3 cup(s) fat-free evaporated milk    
·         2 Tbsp reduced-calorie margarine    
·         12 oz semisweet chocolate, chopped (about 1 1/2 cups)    
·         14 large marshmallow(s)   

Instructions
Coat an 8- x 8-inch pan with cooking spray.
Stir together sugar, evaporated milk and margarine. Bring to a boil in a sauce pan, reduce heat to medium-low and cook 3 minutes, stirring constantly.
Stir in chocolate and marshmallows. Remove from heat and stir until smooth.
Pour into pan and refrigerate until firm, about 2 hours. Cut into 36 squares and serve. (Leave fudge in refrigerator or freezer for a firmer consistency.) 

Friday, January 27, 2012

Foodie Friday

Well today is a great Friday for me!  Number 1 its foodie friday and I always love sharing recipes with you!!  Number 2 I put my 2 weeks notice in at my job today to start a new career path with a new hotel.  I am extremely excited about starting a new job and what fun surprises it will hold.  Its also a beautiful day outside and I have a weekend filled with nothing coming up so I am just an all around happy camper! 

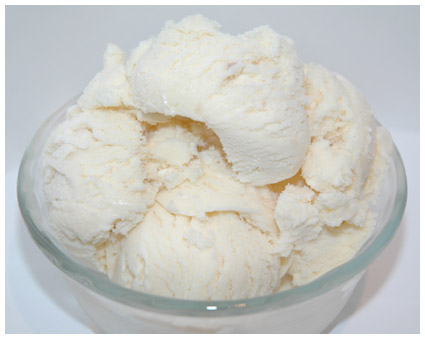
On to the recipe today...because I am in such a good mood I think I am going to share with you my family's icecream recipe.  Nothing fancy or anything but its a family recipe so Im happy to share it with you.  This actually comes from my Grandpa who would make the eggnog variation each year for Christmas.  I loved it and love to make it around Christmas time.  I have a cuisinart ice cream maker that I love and recommend you get one too!  I wish I had gotten a colored one but mine is just silver.  So here is the recipe

Paul’s Famous Homemade Ice-cream


(Paul McCormack recipe)

Servings: 4-5 quarts   Prep Time: 15min   Freeze Time: per ice-cream maker   Difficulty: Easy

Ingredients

• 2c sugar

• 4 large eggs

• 1 can Eagle Brand condensed milk

• 1quart heavy cream (not whipping cream)

• 1tsp vanilla (can be substituted for any flavor)

• Enough whole Milk to fill Ice Cream maker (can be substituted with egg nog)

Instructions

Put sugar in a large mixing bowl. Make a volcano top in the sugar and add eggs. Beat eggs until blended and continue to work in the sugar. With mixer running, add condensed milk slowly until fully blended. Add vanilla any time. Add heavy cream as you continue to mix until thoroughly blended. Pour mixture into freezer and add whole milk as required. Stir to blend before closing freezer.

Yum Yum!  I have been craving icecream all week, I think I am going to make some this weekend!  What awesome recipes do you plan to make this weekend?

Project Housewife Out!


Im Linking Up!  Come visit me at Add A Pinch, A Bowl Full of Lemons, Made Famous By
add a pinch.com  Blog

Friday, January 20, 2012

Foodie Friday

Happy Friday people!  I could NOT be more happy that today is Friday and the weekend is coming up...I mean seriously happy that today is Friday, you have no idea.  Anyway, less talk more food right?!  Well today I have decided to share my cake ball recipe with you guys.  I made this for the first time ever for Christmas and they were a huge hit at home and at work, people scarfed these babies up!  Im not going to lie though, these are very time consuming and if people didnt love them as much as they did I would never consider making them again.  But since they were such a huge hit how could I deprive people of the magic that is a cake ball!!  So without further ado, here it is...LEMON CAKE BALLS

Paula’s Cake Balls


(Adapted from a Smithfield.com recipe)

Servings: 36  Prep Time: 10min Cook Time: 20min  Freeze Time: 1hr Cool Time: 2hrs Difficulty: Moderate

Ingredients

• 1 (18.25 ounce) package cake mix (I used lemon but at the bottom I have other combos)

• 1 (16 ounce) container prepared cake frosting (I used lemon)

• 6 ounces of chocolate flavored confectioners coating disks or bar (I used white but you can use whatever you want)


Instructions

Prepare the cake mix according to the directions on the box.


When cake is finished baking allow to cool for 30 minutes. Crumble the cake into a large bowl using a stand mixer or a hand mixer. Add the frosting and mix until well combined. Place the bowl in the refrigerator for at least 3 hours or overnight.


Line a baking tray with wax paper. Use a melon baller as a scooper to form balls with the cake mixture. Place on wax paper. Once you have used all of the cake mixture, place the baking tray in the freezer for 1 hour.


Melt the chocolate in a glass bowl of the microwave, stirring every 5-10 seconds until smooth. At this point you can add a bit of food coloring if you are using white chocolate.

Remove the balls from the freezer. Using one toothpick, pick up the balls one at a time and dip in the chocolate. Use a second toothpick to slide the ball off the first toothpick onto the wax paper lined baking tray.  We used bamboo skewers and those seemed to work well but if you find that the balls are falling off the toothpick put the balls back in the freezer so they can set longer.


Once you have covered all the balls in chocolate coating place the tray in the refrigerator until the chocolate coating is set. At this point you can drizzle other chocolate on the balls for decoration.  I know mine dont look that pretty, but thats beacause we used a shallow dish for the dipping.  You want a tall skinny dish to melt the chocolate in so that the whole ball gets coated and you dont have a top that doesnt have chocolate.  Also if you find that the chocolate is too thick for dipping (this white chocolate was) then you can add 1tbsp vegetable shortening at a time to thin it out.  This really helped and I was shocked!  I was all ready to add water or oil and those are 2 of the things the package of chocolate said not to add so vegetable shortening saved the day here.

Because I forgot to take a picture of the final pretty ones, here is the source for this picture


Other Combinations:

Red Velvet Cake/Cream Cheese Frosting and dipped in white chocolate coating


Strawberry Supreme Cake/Strawberries and Cream Frosting - Dipped in Chocolate Coating

White Cake/Wild Cherry Vanilla Frosting - Dipped in Dark Chocolate Coating

French Vanilla Cake/White Chocolate Almond Frosting - Dipped in Chocolate Coating

Dark Chocolate Cake/Cream Cheese Frosting - Dipped in White Chocolate Coating

Spice Cake/Cream Cheese Frosting - Dipped in White Chocolate Coating

Confetti Cake/Vanilla Frosting - Dipped in White Chocolate Coating


So there you have it...cake balls!  They are pretty easy but its a lot of waiting around time and those are my least favorite kinds of recipes I want my food NOW dang it!  What is your favorite variety of cake balls?
 
Project Housewife Out!

Im Linking Up!  Come see me at Add A Pinch

add a pinch.com

Friday, January 13, 2012

Foodie Friday!

Happy Friday the 13!!  I dont believe in the supersticion and I also dont have a recipe that makes me think of Friday the 13th so Im just going to act like today is a normal Friday because that how I roll :)

Today I feel like I want some pizza, which is a good thing because our breakroom is closed today and they are buying us pizza...ANYWAY...I figured since I was in the mood for pizza then maybe you would appreciate a nice pizza-esk recipe.  Its a calzone which is even better than a pizza because you could walk around and eat it (although please dont that drives me nuts when people walk around with food, appetizers dont count) and tastes amazing!  Best thing about this recipe, other than its easy, is that its Weight Watchers so its "healthy" and by healthy I mean low cal which is always nice from a pizza. 

Are you ready for the party that will soon hit your mouth...well here goes!

Mini Calzones


(A Weight Watchers Recipe)

Points: 6             Servings: 4                 Prep Time: 5min               Cook Time: 15min          Difficulty: Easy


Ingredients
• ½ c part-skim ricotta cheese

• ¼ c part-skim mozzarella cheese, shredded

• 1tbsp parsley, chopped

• 10oz frozen pizza crust dough (defrosted) (I use the thin crust pizza dough in the refrigerated section I cant be bothered to defrost!)


Instructions

Preheat oven to 425⁰F, spray a nonstick baking sheet with nonstick cooking spray. In a small bowl mix the ricotta, mozzarella and parsley

On a lightly floured surface unroll the dough. With your hands press it into a square; cut into 4 squares. Place the dough on the baking sheet. Divide the cheese mixture among the dough and fold each piece of dough on the diagonal to make triangles; press the edges to seal. Bake until golden brown, 10-15min

**Note** I always have marinara in the house and this really needs the extra kick, but it will also add extra points although Im not sure how many.  Sometimes I put it inside the calzone (which really makes it a stromboli but dont get me started) or I just dip it.  Try it all ways and let me know which you like best I would love to hear!
Wow such an easy recipe right!  Only 4 ingredients and takes only 20 minutes wow even better!  These babies taste pretty good leftover too so if your a family of 2 like I am then take them for lunch.  I hope you enjoy it

Project Housewife Out!

Im Linking up!  Come check me out at Add A Pinch

add a pinch.com

Friday, December 2, 2011

Foodie Friday!

HAPPY FRIDAY!  Im especially happy about this Friday because tomorrow we leave for Walt Disney World and the Christmas madness that only Disney can do!  So next week my posts will be about the fabulous expolits of our time in Disney.  We are going to be visiting the Wizarding World of Harry Potter also so prepare for the amazingness of that too.  In case you didnt know, I am obsessed with Harry Potter and Disney...I wish the Wizarding World of Harry Potter would have been bigger but Universal (which I loath) wasnt as smart as Disney and doesnt have acers of land that they can expand on.  Oh well, thats why Walt Disney World will always be the best!  Ok enough of that tangent, on to bigger and better things...FOOD!!!  Today I am going to share with you a Weight Watchers recipe that I happen to love.  Actually I love all the recipes that I have made from Weight Watchers, but this one is amazing.  This recipe calls for pork, but I dont love pork so we use chicken, but thats easy enough to figure out so here is the recipe.


Sweet and Sour Pork
(A Weight Watchers Recipe)
Points: 7               Servings: 6          Prep Time: 20min             Cook Time: 45min         Difficulty: Easy

Ingredients

Instructions

Heat a nonstick skillet coated with cooking spray over medium-high heat.

Add pork and cook until golden brown, about 8 to 10 minutes; remove from skillet and set aside. Drain any remaining fat from skillet.

Drain pineapple chunks, reserving juice; set aside.

Combine water, vinegar, sugar, cornstarch, salt, soy sauce and reserved pineapple juice in a small bowl; add to skillet and cook until sauce is slightly thickened, about 2 minutes. Add pork; cook covered over low heat until meat is tender, stirring occasionally, about 30 minutes.

Add peppers, onion and pineapple chunks; cook 5 minutes. Serve over rice. Yields about 1 cup of pork and 1/2 cup of rice per serving.


Nutrition

Calories 343.4,Calories from Fat 44,13%,Total Fat 4.9 g,7%,Saturated Fat 1.5 g,7%,Cholesterol 73.7 mg,24%,Sodium 348.4 mg,14%,Total Carbohydrate 47.7 g,15%,Dietary Fiber 3.7 g,15%
Sugars 18.1 g72%, Protein 26.7 g 53%


I love this recipe and you can have so much fun with this.  When Im feeling lazy, I get the frozen 3 bell pepper mix from kroger and use that rather than the fresh stuff, or you can get the asian stir-fry blend and use that...with veggies you have so many options!  Like I said earlier I also sub chicken for pork, but you could also do beef if you wanted to, the basic principles of the recipe stay the same, the only big change is the nutrition/points value.

Have fun making this, and if you have some awesomely great variation share, I would love to hear what you did!

Project Housewife Out!